How to Troubleshoot a Sprinkler System: Top 7 Expert Tips
Why Efficient Irrigation Matters
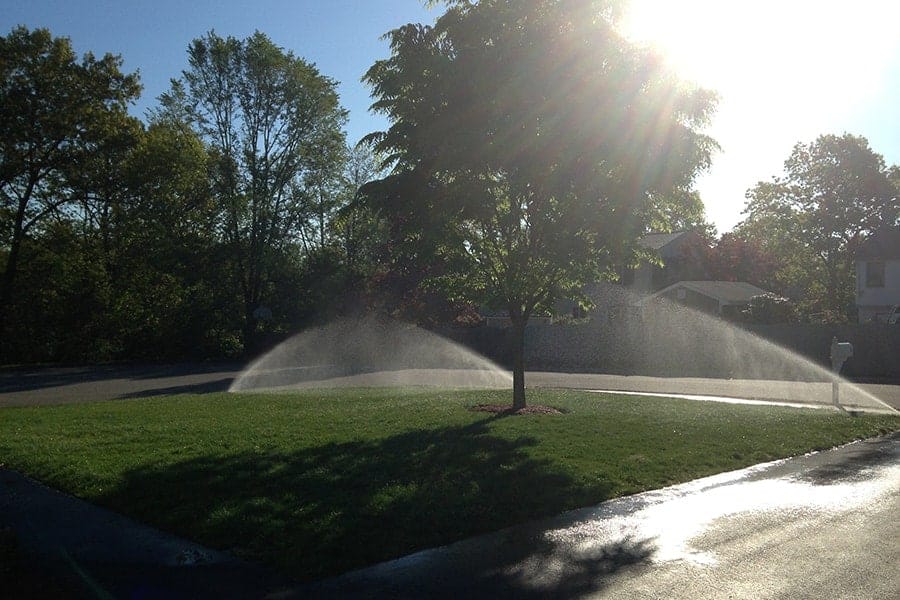
How to troubleshoot a sprinkler system can seem daunting, but understanding a few basics can save you time, water, and money.
Here’s a quick checklist to get you started:
– Check the controller: Ensure it’s working and correctly programmed.
– Inspect sprinkler heads: Look for damage or blockages.
– Test the valves: Make sure they open and close properly.
– Evaluate water pressure: Verify it’s within the optimal range.
Efficient irrigation is crucial for maintaining a lush, healthy lawn while conserving water. Faulty systems lead to wasted resources and higher costs, making prompt troubleshooting essential. Effective sprinkler systems ensure even water distribution, reducing brown patches and overwatered zones.
I’m Peter Pappas, owner of P.J. Pappas Company. With over 37 years in the irrigation industry, I specialize in designing, installing, and troubleshooting sprinkler systems. My journey began working on golf courses, where I learned every aspect of lawn care and irrigation.

Identifying Common Sprinkler System Issues
Controller Issues
The controller is the brain of your sprinkler system. It manages the timing, duration, and zones for watering. If your system isn’t turning on or off at the right times, or if some zones aren’t getting watered, the controller might be the issue.
Peter Pappas, owner of P.J. Pappas Company, says, “Consistency is key. If your system isn’t consistent, it might be a faulty controller or an electrical issue.”
Low/High Water Pressure
Water pressure problems can affect the reach and efficiency of your sprinklers. Low pressure might cause heads to barely spray water, while high pressure can lead to misting and uneven coverage.
A customer in Colorado experienced low pressure in two of their zones. After some investigation, it turned out that tree roots were obstructing the pipes. Checking for such obstructions or leaks is crucial.
Stuck Heads
Sprinkler heads that don’t pop up or retract properly can cause uneven watering. This issue might be due to debris or mechanical failure. Sometimes, the heads might be broken and need replacement.
Puddles
Puddles around your sprinkler heads can indicate leaks or drainage issues. Leaks not only waste water but can also damage your lawn. Regularly inspect your system for any signs of water pooling.
Peter advises, “Leaks are the death knell for any irrigation system. Catch them early to save on water bills and prevent lawn damage.”
Uneven Patterns
Uneven spray patterns can leave some areas dry while overwatering others. This might be due to misaligned or broken heads. Adjusting the heads or replacing them can often solve the problem.
Identifying these common issues early can save you time, money, and water. In the next section, we’ll dive into how to troubleshoot a sprinkler system with basic steps to get your system back on track.
How to Troubleshoot a Sprinkler System: Basic Steps
Troubleshooting a sprinkler system can seem daunting, but breaking it down into simple steps makes it manageable. Here are the basic steps to get your system back on track:
Visual Inspection
The first step is a thorough visual inspection. Walk through your lawn and check all visible components of the system. Look for:
- Broken or clogged sprinkler heads: Heads that don’t pop up, spray erratically, or are completely broken off.
- Puddles or wet spots: Areas that are unusually wet can indicate leaks.
- Dry patches: These might suggest that some sprinkler heads are not functioning.
Check Water Supply
Ensure that your water supply is on and functioning properly. The main shutoff valve should be fully open. If the valve is partly closed, it can reduce water pressure and affect the sprinkler system’s performance.
- Locate the main shutoff valve: This is usually near where the water supply enters your home.
- Check for leaks: Inspect the pipes leading to your irrigation system for any visible signs of leaks or damage.
Controller Settings
Your sprinkler system’s controller is the brain of the operation. If the controller isn’t working correctly, none of the zones will activate.
- Power Supply: Make sure the controller is plugged in and has power. A tripped breaker or blown fuse could be the issue.
- Program Settings: Verify that the correct times and durations are set for each zone. Sometimes, a simple reset of the controller can resolve the problem.
- Rain Sensor: If you have a rain sensor, ensure it’s not activated or malfunctioning. Bypass it temporarily to see if the system works.
Valve Inspection
The zone valves control the flow of water to different areas of your lawn. If a valve is malfunctioning, it can affect the entire zone.
- Manual Operation: Try manually opening the valves. If water flows when operated manually but not automatically, the issue may be with the controller or wiring.
- Check Solenoids: A faulty solenoid can prevent a valve from opening. Use a multimeter to check for continuity. Normal readings should be between 20-70 ohms.
- Inspect Diaphragms: A damaged diaphragm can cause leaks or prevent the valve from closing properly. Disassemble the valve and inspect the diaphragm for wear and tear.
Following these basic steps can help you identify and solve many common sprinkler system problems. If these steps don’t resolve the issue, it might be time to dive deeper into specific problems, which we’ll cover in the next section.
Diagnosing and Fixing Specific Problems
Sprinkler Controller Isn’t Working Properly
The sprinkler controller is the brain of your irrigation system. If it’s not working, nothing else will. Here’s how to troubleshoot it:
Check Power: Make sure the controller is plugged in and receiving power. Sometimes the simplest solution is the right one.
Inspect Wiring: Open the controller box and check for any loose or damaged wires. Ensure all connections are secure.
Transformer Test: Use a multimeter to test the transformer. The reading should be between 24-28 volts. If it’s lower, you may need to replace the transformer.
Low or High Water Pressure
Water pressure issues can cause your sprinklers to either barely spray or erupt like geysers. Here’s how to address it:
Backflow Device: Ensure the water valves at the backflow device are fully open. This device is usually located above ground.
Pipe Leaks: Look for soggy spots or pooling water in your yard, which can indicate a leak. Repair any damaged pipes you find.
Pressure Gauge: Use a pressure gauge to check the water pressure. Ideal readings should be between 40-60 psi. Adjust as necessary.
Sprinkler Heads Issues
Sprinkler heads are the most visible part of your system and often the source of problems. Here’s how to troubleshoot them:
Clean Heads: Dirt and debris can clog the heads. Remove and clean them thoroughly.
Adjust Spray: Sometimes, the spray pattern needs adjusting. Most heads have a screw for this purpose.
Replace Heads: If a head is damaged beyond repair, replace it. Make sure to choose the right type for your system.
Zone Valve Malfunctions
Zone valves control water flow to different parts of your yard. If a zone isn’t working, here’s what to do:
Voltage Test: Use a multimeter to check the voltage at the valve. It should read between 24-28 volts when activated. If not, you might have a wiring issue.
Solenoid Check: The solenoid is the part that opens and closes the valve. Test it with a multimeter; a good solenoid should read between 20-40 ohms. Replace if faulty.
Diaphragm Repair: Disassemble the valve and inspect the diaphragm. If it’s damaged, replace it.
Leaks and Puddling
Leaks can waste water and damage your landscape. Here’s how to find and fix them:
Identify Source: Look for wet spots or areas where water is pooling. This can help you locate the leak.
Repair Leaks: Once you find the leak, turn off the water and repair the damaged section of the pipe.
Adjust Drainage: Ensure your yard has proper drainage to prevent water from pooling. You may need to regrade certain areas.
By following these steps, you can troubleshoot and fix many common sprinkler system issues. For more complicated problems, it might be time to call in the experts at P.J. Pappas Company.
Next, we’ll cover advanced troubleshooting techniques.
Advanced Troubleshooting Techniques
Using a Multimeter
A multimeter is a handy tool for diagnosing electrical issues in your sprinkler system. Here’s how to use it:
- Set to Ohms: Switch your multimeter to the ohms setting.
- Test Solenoids: Place one prong on the common wire terminal (usually labeled ‘C’ or ‘COM’) and the other on the terminal of the zone you’re testing. A good reading is between 20-70 ohms. No reading or a very high reading indicates a problem.
- Check Voltage: Switch to AC voltage. Put one prong on the common terminal and the other on the zone terminal. When the zone is active, it should read between 24-29 volts.
Digging Safely
Sometimes, diagnosing issues requires digging. Follow these tips to dig safely:
- Call Before You Dig: Always contact your local utility company to mark underground lines.
- Use a Shovel Carefully: Dig slowly and carefully to avoid damaging pipes or cables.
- Locate Valves and Pipes: Use a wire locator if necessary to find buried wires and pipes before digging.
Systematic Testing
Approach troubleshooting in a systematic way to avoid missing any issues:
- Zone-by-Zone Testing: Test each zone individually to isolate problems.
- Manual Operation: Manually activate each valve to ensure they open and close properly.
- Check Connections: Inspect all wire connections for corrosion or loose fittings.
By mastering these advanced techniques, you can effectively troubleshoot and maintain your sprinkler system, ensuring it runs smoothly. For intricate issues, consider reaching out to the experts at P.J. Pappas Company.
Next, we’ll discuss when to call a professional for your sprinkler system needs.
When to Call a Professional
Sometimes, despite your best efforts, sprinkler system problems can be too complex to handle on your own. Here’s when you should consider calling in the pros:
Complex Issues
If you’ve tried basic troubleshooting steps like checking connections and testing zones but still can’t find the problem, it might be time to call a professional. Complex issues often involve:
- Broken Wires: Finding and fixing broken wires can be a tricky task. You may need specialized tools like a wire locator.
- Valve Problems: Issues with zone valves, such as a faulty solenoid or diaphragm, often require professional diagnosis and repair.
- Leaks and Puddling: Persistent leaks or puddling can indicate deeper issues like underground pipe damage.
System Upgrades
Upgrading your sprinkler system can make it more efficient and easier to manage. However, these upgrades often require professional expertise:
- New Controllers: Modern controllers offer advanced features like weather-based adjustments. Installing and configuring these can be complex.
- Smart Irrigation: Systems like the Hunter Pro HC or Rachio 3 provide enhanced control but need professional installation to ensure they work correctly.
- Efficiency Improvements: Professionals can audit your system to find ways to save water and reduce costs.
P.J. Pappas Company
When you need expert help, P.J. Pappas Company is your go-to solution. Here’s why:
- Expertise: With over 37 years of experience, P.J. Pappas specializes in irrigation systems. They stay updated with the latest technology and best practices.
- Precision: Their team focuses exclusively on irrigation and landscape lighting, ensuring precise and professional installations.
- Customized Solutions: Whether you have a small lawn or a large commercial property, P.J. Pappas can design and install a system tailored to your needs.
- Dedicated Service: They offer ongoing maintenance and support, ensuring your system runs smoothly year after year.
For more information or to schedule a consultation, contact P.J. Pappas Company.
Next, we’ll wrap up with some maintenance tips and the importance of regular audits.
Conclusion
Maintaining your sprinkler system is crucial for its efficiency and longevity. Here are some simple maintenance tips to keep your system in top shape:
- Regular Inspections: Check your sprinkler heads and valves for dirt and debris. Clean them regularly to prevent clogging and ensure optimal performance.
- Seasonal Adjustments: Adjust your sprinkler run times and schedules based on the season. This helps conserve water and keeps your lawn healthy.
- Monitor Water Pressure: Keep an eye on your system’s water pressure. Low or high pressure can cause issues with coverage and efficiency.
- Replace Worn Parts: Over time, parts like sprinkler heads and valves can wear out. Replace any damaged or malfunctioning components promptly to avoid bigger problems.
Regular audits are essential for catching potential issues before they become costly repairs. We recommend scheduling a professional sprinkler system audit at least once a year. This will help identify inefficiencies and opportunities for upgrades, saving you water and money in the long run.
When it comes to expert service, you can rely on P.J. Pappas Company. With over 37 years of experience, we specialize in designing, installing, and maintaining lawn irrigation systems. Our team is dedicated to providing customized solutions and ongoing support to ensure your system runs smoothly year after year.
For more information or to schedule a consultation, contact P.J. Pappas Company.
By following these maintenance tips and scheduling regular audits, you can keep your sprinkler system working efficiently and effectively. And when you need expert help, P.J. Pappas Company is here to assist you every step of the way.
